

How to Deposit (ver. 0.2)
The resources in the CLARIN-PL repository are deposited by the authors. Each item has to be provided with complete and correct metadata, the data need to be in well-documented and in open formats, accepted in their respective communities, IPR issues have to be resolved, and clear statements with regard to licensing and possible use of the resources must be made. The depositor is required to electronically sign the deposition agreement acknowledging the (s)he is the holder of rights to the data and that (s)he has the right to grant the rights contained in this licence. Once an item is submitted, it undergoes an editorial review to ensure it meets the requirements of the CLARIN-PL repository. Please carefully read the following guidelines, in order not to have your submission needlessly rejected. If you still have questions about the resource to be submitted, please get in touch with the repository Help Desk The guide below describes how to enter the metadata for new submissions. How the actual data (i.e. language resource) should be submitted is explained in the CLARIN-PL guidelines for data submissions, while how to deposit a new version of a resource is explained in Submitting a new version of an Item.
Here we describe the deposit process. If you want to start a new submission go to your Submissions.
Step 1: Login
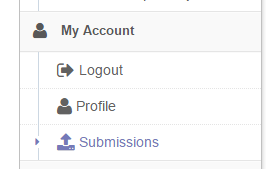
To start a new submission you have to login first. Click Login under My Account in the right menu panel.

Step 2: Starting a new submission
Now you have a new menu item 'Submissions' under My Account. Click on Submissions to go to the Submissions screen.
Now you should be on the main Submission and Workflow tasks page where you can view your incomplete/archive submissions. Click on the 'Start another submission' link to start a new Submission.

Step 3: Select type of your submission
You have initiated a new workflow item. In the next few steps you will provide the details about the item and upload content files. First select the type of the resource you are about to submit.

Click on one of the type buttons e.g. Corpus. Proceed with filling the basic information such as the title. Click Next to continue the following step.
Step 4: Describe your item
In the following two steps you will provide more details for your item. First describe the people, organization and projects involved with the item.
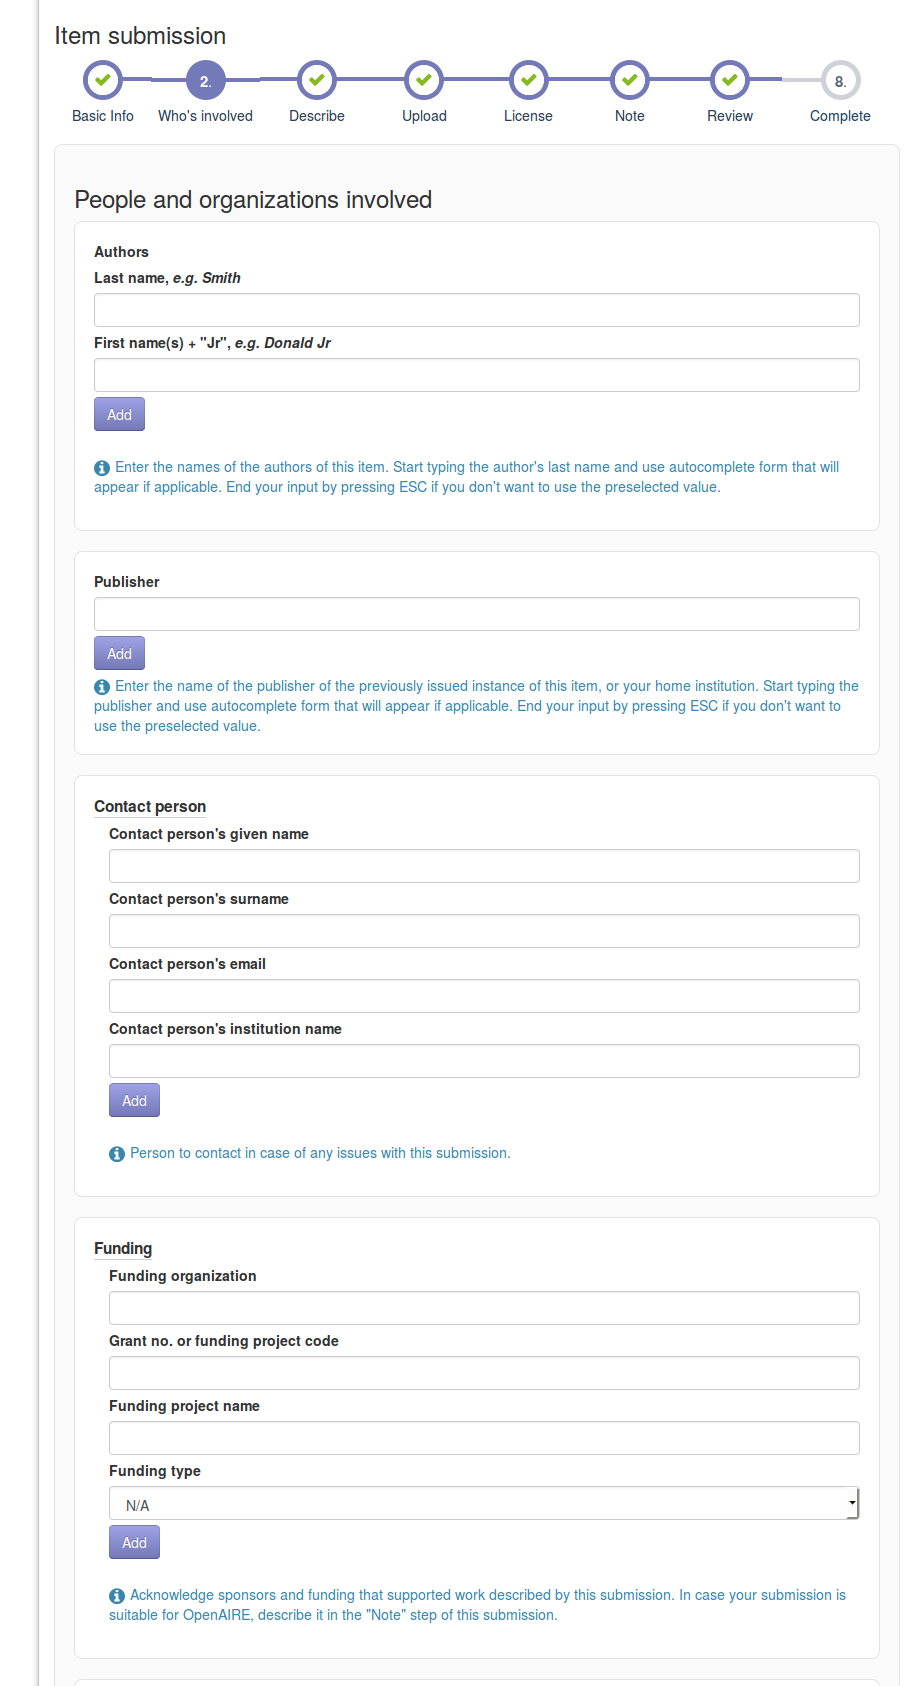
Next add your description, fill the language, etc.

Once you filled the necessary information, click Next to upload the content files.
Step 5: Upload files
In this step you will upload the content files of your submission. If there are no files, you can skip this step by clicking Next. The files can be added by clicking the browse button or you can drag and drop files in the gray area with text 'Drag and Drop file(s) here'.

Selecting files will open a dialog box, where you can enter the description of each file. To begin the file upload click 'Start Upload'.
Once the file(s) upload is done, press OK to close the dialog box. You can add more files or delete/modify the already uploaded ones, after you finish press Next to continue with the License selection.
Step 6: Select Licenses
If you uploaded at least one file, you must select
a license under which you want your resources to be distributed in this step (data without
license is unusable because a user does not know how can he/she use it!).
Please read the Distribution agreement carefully
and click the red box to indicate your agreement (it will turn green).

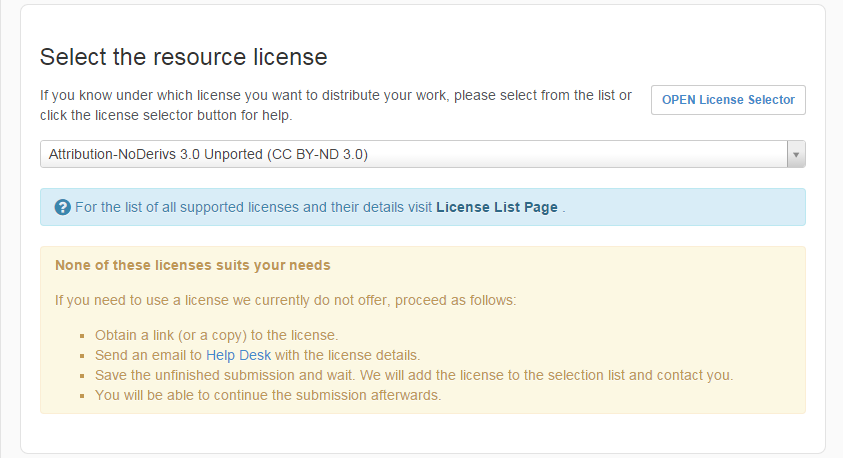

For datasets that require license signing
While we prefer open data and open source software, we understand it is not always possible. We can ensure that users must authenticate and sign a license in order to download your data (see Restricted Submissions). If you need more information about the users than the fact that they authenticated via a university (or similar), we can ask for some specific attributes similar to standard web forms. This makes sense mostly for data with "no redistribution" clause in their license.Click Next to continue.
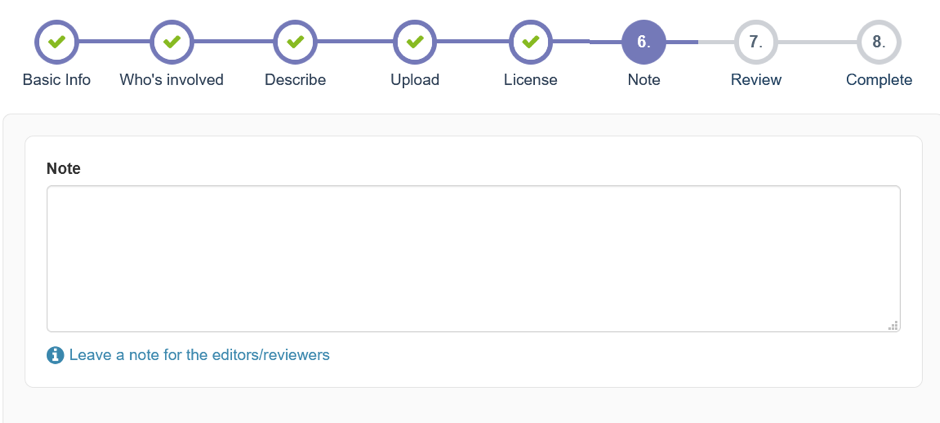
Step 7: Leave a note
You can leave a note for the reviewer in this step.
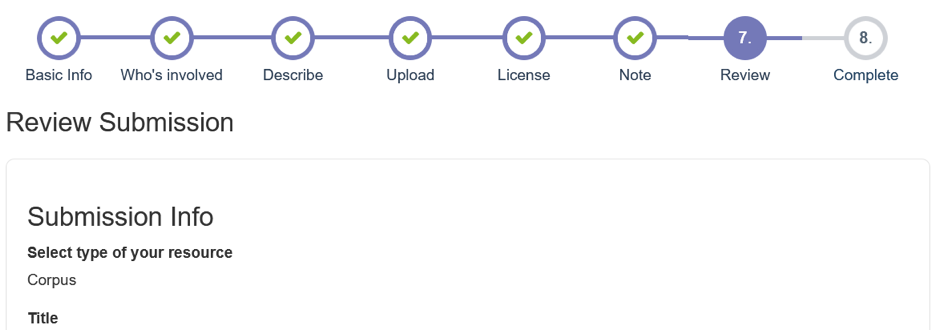
Step 8: Review your submission
In this step you will review your submission before submitting it. Review page contains a sub-review panel for each of the step you have filled in before. If you want to change any field in a particular step just click Correct one of these and it will take you directly to the particular step page. Once you verify all the detail, submission can be made by clicking Complete Submission or you can click Save & Exit to save the submission for continue working on it later.
Step 9: Submit
Once you click the Complete Submission in the review step, item will be submitted for the reviewing by the editors. Once the editors approve the item it will appear in the repository. In case of any query regarding the submission, editors will contact you for the further detail.